
Stacks and filters

One of those things that immediately grabs your attention when you open the engine bay on a 356 are the air filters. The original Pre-A's used dual single Solex carburettors moving on to the two barrel P40 Solex carburettors for the later 1600's and both setups used Knecht air filters which are visually distinctive in both cases both having the raised pressed Knecht logo on the top of the filters.

Knecht air filters are now fairly expensive to buy and whilst there are some look-a-like filters made by Flat-4 and CSP none are exactly the look that I'm after and these are also getting on towards Porsche prices. So faced with the challenge I decided to buy some regular run of the mill IDF filters and undergo some modifications to make them more Knechty-looking.
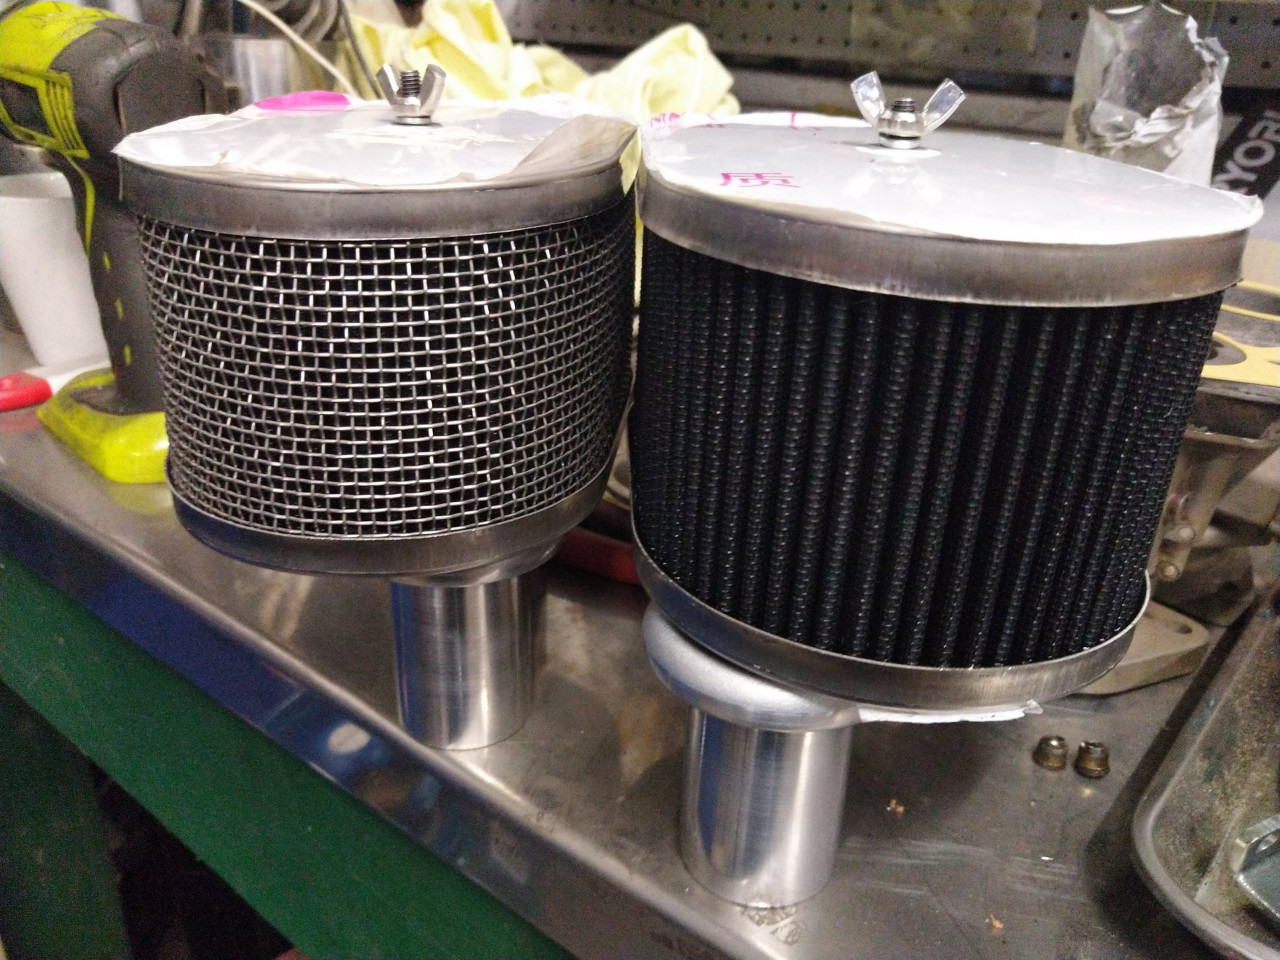
The biggest visual impact for me and the one that really makes the 356 air filters look different from the regular K&N style filters that are more commonly found on VW's is the wire mesh construction. You would be forgiven for thinking that this mesh is a protective outer filter screen but the actual truth of the matter is that the mesh is the filter. There's actually two layers - an inner and outer screen. They notorious for not being that great as an actual filter.
So to mimic the style I purchased some stainless woven mesh. This is not exactly the same as the original mesh as that had a twist in the weave which you can see in the following photo, this style of mesh is unfortunately unavailable.

Like the Flat 4 and CSP filters the mesh simply wraps around the outside of the regular filter element to give the visual impression of the Knecht style filter. It does not serve any functional use and is completely cosmetic. It's held in place by the filter element pushing against it and holding it in place, so no additional fixings are required.
The next thing to address is the large unsightly wing nut on the top of the filter. Whilst this is necessary as it holds the filter together, I plan to change it to a captive nut and bolt. I also plan to add four additional dummy bolts to replicate the look of the original Knecht filter. I will also press some indentations into the lid to accept the bolts.
I'm considering 3D printing a press tool to press a Knecht style logo into the top, but I'm not too sure how this will hold up in practice. The top is stainless steel which is a fair bit harder to press than mild steel. Given that 3D printing will produce a plastic press tool it might not have enough strength to work even for only one impression. Only one way to find out I guess.
The eagle-eyed amongst you might have noticed that the filters are perched atop some velocity stacks. I managed to source some 36mm stacks to fit the 36mm Weber IDFs. These are a little too long so I will have to trim them down to fit inside the filters. They were made by a company called JNT Performance in NSW who have a range of off the shelf aluminium spun velocity stacks in various sizes. They were super helpful and they arrived next day (I'm in SA too.).

The thing I like about these is that they have a fully formed lip which flow a lot more than the regular 'trumpet' style stacks as air is not only drawn from in front of the stack but from all around it. Unfortunately they are not a tapered design and so may be a little more restrictive in that respect but I will see how they work out. They will be heaps better than running no stacks at all.

So in addition to making the mods to the air filter lid I need to make some flanges to mount the velocity stacks to the carburettors and cut them down to size. I also need to make some 36mm manifolds to suit the Okrasa heads. Unfortunately all of the aftermarket manifolds are 40mm and so not really suitable for my engine. The rather nice looking Speedwell Okrasa manifolds are now unobtanium and the S&G units are too large. So I'll make some manifolds from steel tube and form them to suit. They will be reminiscent of the original Pre-A Solex manifolds which were also a tubular steel construction.
As usual, still lots to do but a small step in the right direction always helps.
Comments