Sebring Exhaust Part 2

If you read my previous post Sebring Exhaust Part 1 you would know that I have decided to build my own Sebring style exhaust.
This evening I managed to get a little time to make a start on it.
I decided to make a start on the collector as this is really the defining part. It's also the most difficult part. The collector is where the seperate pipes from each exhaust port merge into one pipe and the way that it is constructed plays a big part on the performance of the exhaust.
Modern VW collector design has been optimised to the point where a long collector arranged in a square configuration with the pipes organised in firing order is commonly regarded as the best flowing design. Each port helps to scavenge the adjacent port. The Sebring design is different in that the merged tubes are laid flat and joined parallel to each other. The scavenging effect is therefore less and also not equal between cylinders.
Optimising the collector design will not yield the same kind of results that you would get from a proper long style square layout collector, but it's still a worthwhile exercise. The basic layout is of course a given but the first thing to determine is how much of each of the four primary tubes should be removed to allow them to overlap. For this I decided on an aesthetic approach.
Of the many different Sebring styled designs I have seen the proportions of the exhaust tip seem to vary greatly. The outlet should look in proportion with the rear of the car and also with the rest of the exhaust. Given that the system I'm building is only 1 5/8" (38mm) diameter a massive outlet is not going to look right. The height is basically governed by the exhaust diameter, the width however is what needs to be determined.
After making some cardboard templates and offering them up to the car I settled on a width of 2 1/2 times the height giving an overall width of 95mm. Now to determine how much to cut out of each of the tubes to give an overall dimension of 95mm.
As there are four primaries and we only want an overall width of 2.5 primaries we are left with 1.5 x 38mm to remove. If we split this three times, one for each join, we end up with 19mm of material to be removed for each join. Now if we further split this in half (9.5mm) we get the amount to remove from each side of each primary.
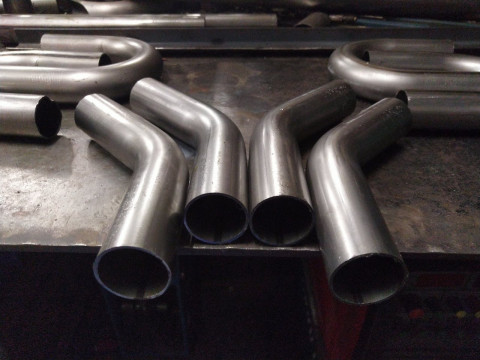
The next design constraint to address was the angle of the exhaust. On the 356 they often point upwards and likewise the VW versions often point straight out leaving a gap between the exhaust and bumper or valence. Making the exhaust point upwards is simply a case of slightly rotating each of the 45 degree bends so that the outlet is angled upwards. However when I checked the rear valence on my car I found that the exhaust could be more or less straight.
With the necessary measurements now known I set up my laser at 9mm and marked each leg up. I then cut all four on the bandsaw.
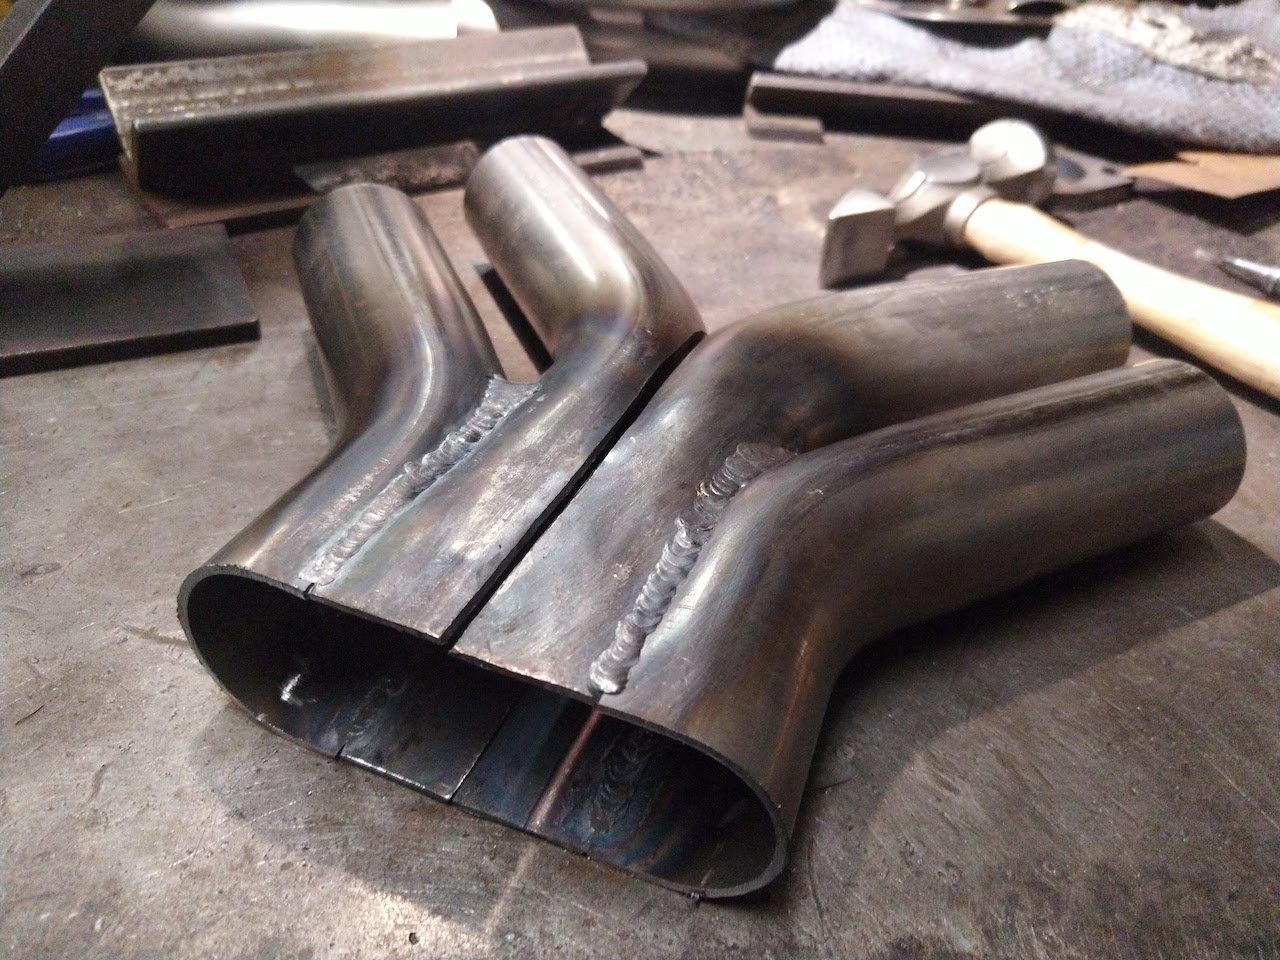
Cutting and profiling where the outside two legs join the inner legs was a little tricky so I ended up with a bit of a larger gap right at the root of the join, but I was able to bridge the gap when I welded it up. Ideally I should have made a trial from some UPVC pipe so that I could figure out the correct profile but I'm far too slap-dash for that. :D
Unfortunately I ran out of welding gas before I got to finish it so was not able to join the two halves together so It'll have to wait until I get some gas before I can finish it.
There's still some tidying up and blending of the insides I want to do before I close it up. The general finish inside is not too bad but I want to make sure that each side is the same and that there are no obstructions to the flow. The outer pipes flow nicely across the inner pipes which should maximise the scavenging effect, albeit a little unevenly compared to the inner pipes, but that's simply a design flaw of the Sebring layout. This uneven or unbalanced layout will also affect the exhaust tone which is what gives it that unique Sebring sound.
I'm pretty pleased with how it's looking so far. Once it's all closed up I'll start to take a look at the silencers. For this I need to make a press tool to form the end covers.


Comments