-
So another day of slowly chipping away at all of those little jobs needed to get the bus back on the road again. I started off by making up a new oil feed pipe to replace the one I crushed with the engine jack. The hardest part was removing the old pipe with the moustache bar in place. It was originally installed before the moustache bar went on and whilst the engine was on the engine stand so access was not an issue, trying to do the same thing with the engine in the bus with practically zero clearance underneath was not exactly my idea of fun. Anyhow's, the inevitable happened and I crushed my finger undoing one of the fittings (ouch). No pain, no gain as they say.
So with the oil hard line replaced I hooked up the flexi lines and decided to add some oil. I had already filled the filter up with oil when I installed it (it takes over a litre of oil alone) and just needed to fill the engine. To help with filling the oil with a supercharger installed I made a useful contraption some years back; basically an old plastic oil container with the bottom cut out and a rope tied through it to hang it from the gutter. On it's outlet is a length of hose that can be run into the filler neck. It's basically like a giant funnel with a hose on it. So I dig it out from the garage and give it a wipe out as it has a bunch of dust and stuff inside, and then hook it up to the engine. I look inside and see something in there, so I wipe it out some more and go get the remainder of the oil.
For the initial fill I'm using a diesel oil, Diesel oil has a higher proportion of detergents and so will give the engine a good clean out whilst I break in the new rings, otherwise it is the same as petrol based oils. It's also heaps cheaper than running an engine clean additive like Winns or whatever. My dad used to work at Mobil this was one of the handy tips he gave me.
Anyhow's, I digress, I get the oil and pour some in the 'contraption', but looking inside I see what looks like a slug. Wondering how it got in there I ponder for a second whether the slug would do any damage to the engine, I figure it would get mushed up by the oil pump gears so possibly not, but then consider that it could also get jammed in the oil pickup tube and cause an oil starvation issue and result in catastrophic failure so decide that it's best not to add it to the engine. So I remove the contraption and try to fish the slug out. Well, what I thought was a slug actually turned out to be skink (a small lizard about 4 inches long) Unfortunately he (or she) had met their maker drowning in dieseltec 20/50. So I remove the skink and pour in the remainder of the oil. The oil level is just over the max fill line but I know that once the air has bled out of the cooler it will pretty much be perfect. Funny how you get to know your car after a while (and regular oil changes.)
So with the oil in I move on to the next job, taking a look at the exhaust...
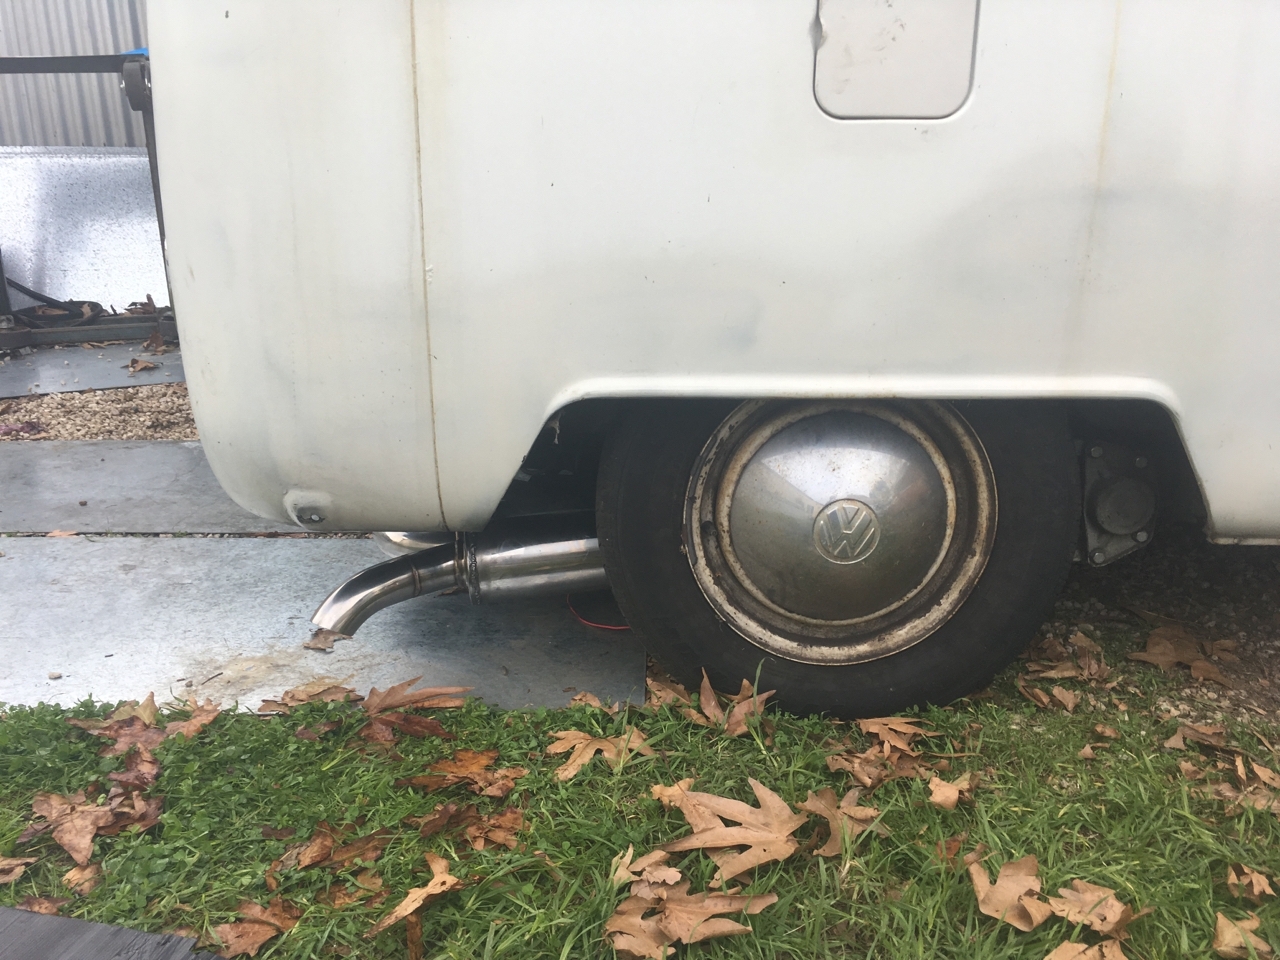
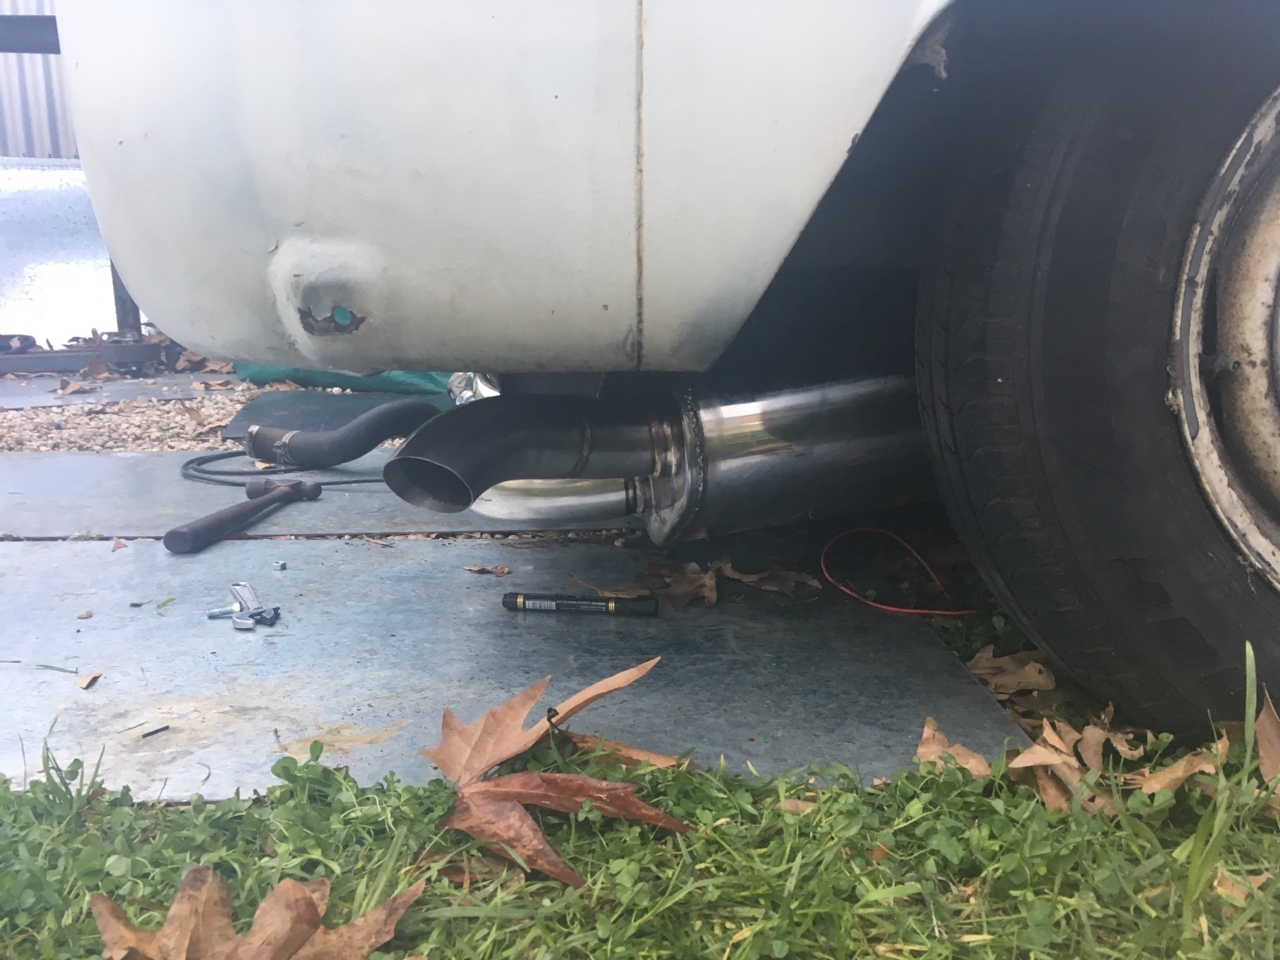
I messaged a buddy of mine in WA who also has a similar system fitted and he was kind enough to send me some photos of his install (thanks Humpty), he said he had to shorten his muffler and angle the muffler to gain extra clearance. So armed with a a plan of what I needed to do I set about hacking mine to try and achieve the same
First job was to disassemble the muffler, this involved cutting around the end cap at the tail pipe end. Once I had cut through the weld I was able to slide the inner and outer parts apart. The muffler is basically a perforated pipe, that is surrounded by kawool (a fireproof 'wool' often used in furnaces). I shortened the inner part and welded it back together.
The overall length of the muffler needed to be shortened by about 50mm so that it cleared the bottom shock mount so this is what I cut out of both the inner pipework and the outer cover. With everything shortened I reassembled it and welded it back up. *just a note here* I hate welding stainless, not only did I have the wrong gas, but I also do not have the correct equipment to gas purge the pipe which results in a buildup on the inside of the pipe opposite the weld. This means masses of grinding and a non-cosmetic weld. Of course, the bus is no show pony and I don't really care what it looks like, in fact the rattier, the better.
So with the muffler shortened the next stage was to relocate it to try and create some ground clearance. This basically involved cutting it at the muffler and cutting it at the collector flange and re-welding it back together so that the muffler was mounted at an upwards angle and tucked back in a little more. After tacking it together, offering it up, making some adjustments, re-tacking it together, offering it up, making some adjustments, re-tacking it together, offering it up again it was looking pretty good. So I welded it up. Muffler done! but probably easier to make one from scratch.
So next I pondered my next steps - fit the rear shocks, adjust the rear spring plates, fit the missing bolts in the rear hubs, adjust the brakes, finish running the loom, hook up the ECU, prime the oil system, fit the front shocks, fit the front ball joints, drop spindles, hub adaptors, mod the front roll bar...
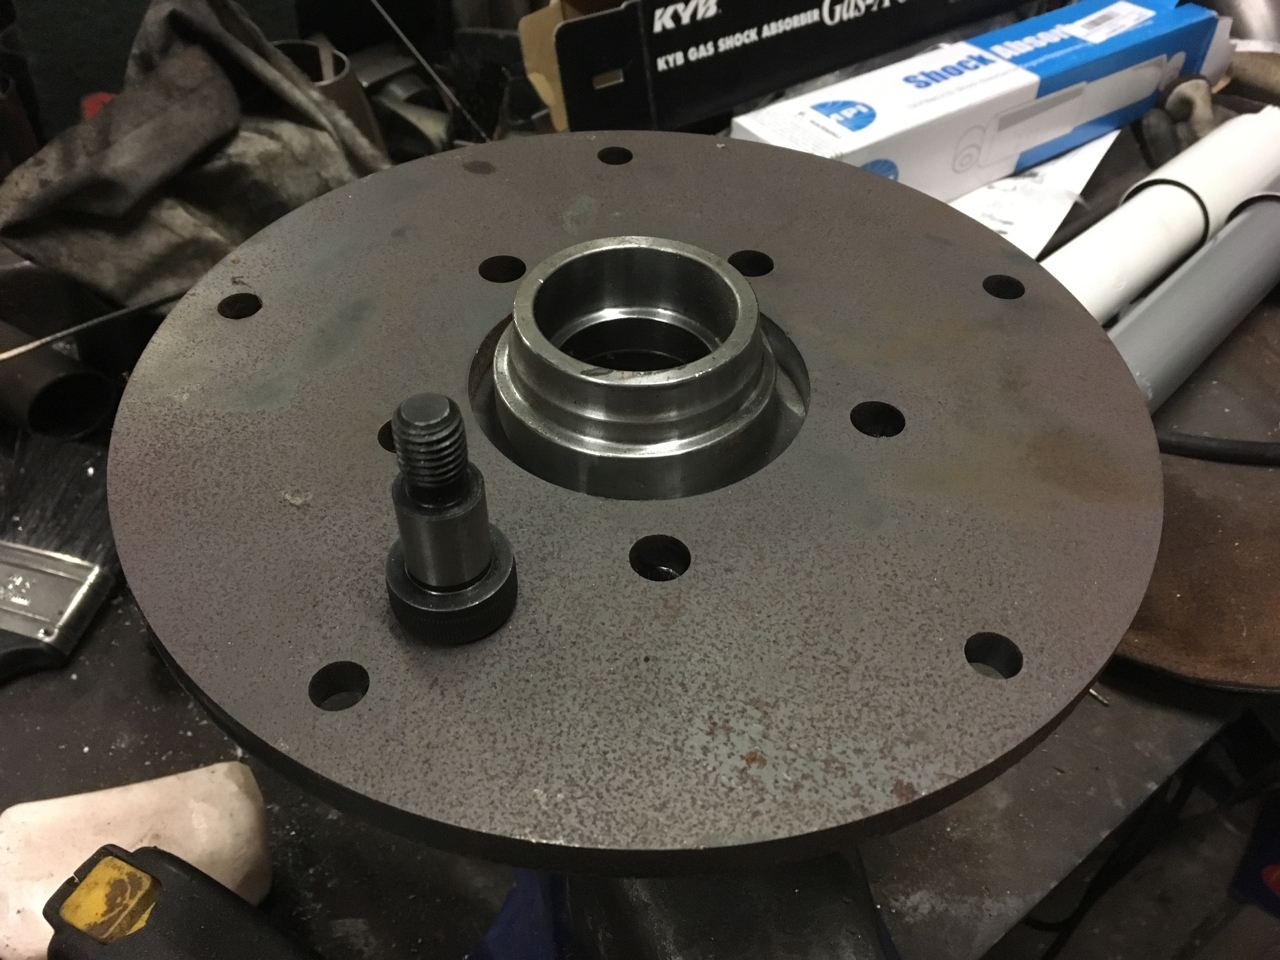
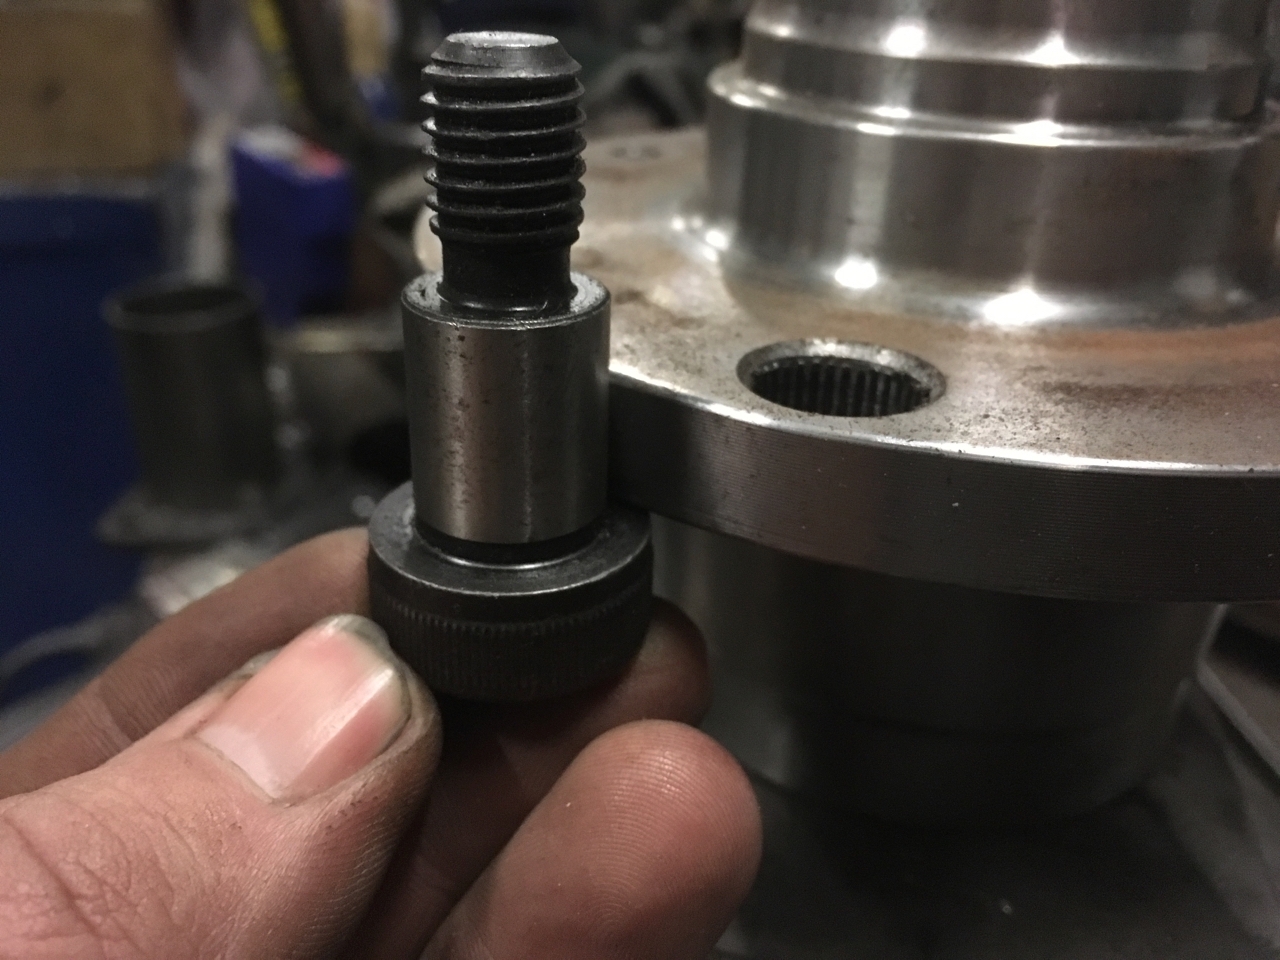
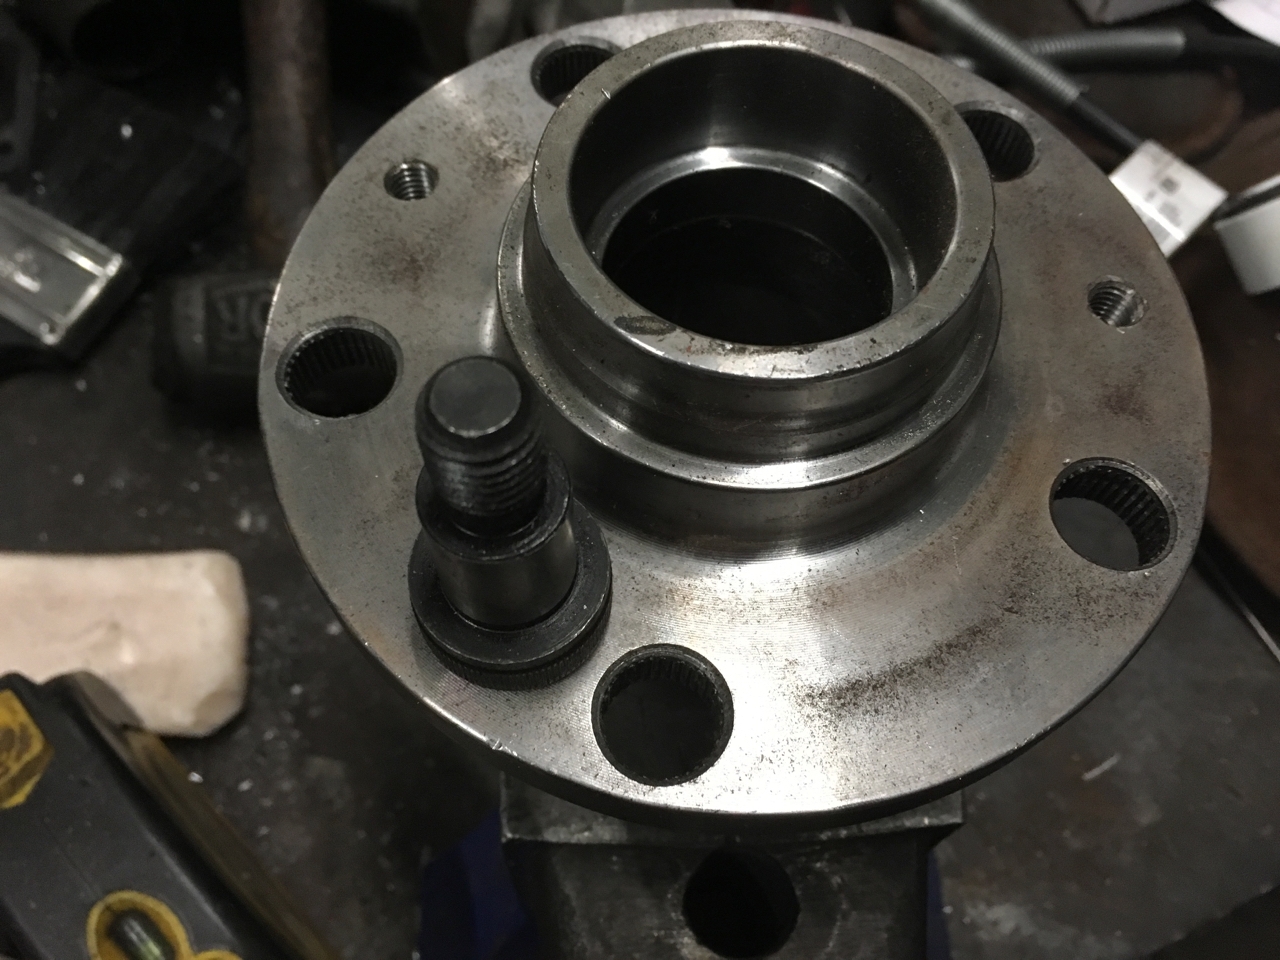
The list goes on, but whilst pondering I came up with a solution for the front adaptors I had made to convert the late bay drop spindles to wide 5. I had these made from a CAD drawing I was given but never really liked that the centres were a LOT larger than the hubs and so were not supported by the hubs (not good in my books). My brainwave was that I could use shoulder bolts to locate the hubs to the discs and adaptors - basically acting as dowels to ensure that the adaptors are perfectly hub-centric. This is cool for two reasons...
1. I can use the adaptors I had made up, saving some money
2. I already have the stuff so don't have to wait.
3. Yeah-right, like I've got the 'spare' time to just do this - lol
So, another piece of the puzzle slots into place. I'm kinda thinking at this stage that I'll just get the bus running and driving again and then maybe work through the list of other jobs. A bit like a rolling resto, after all the bus is starting to look a bit tired after sitting under my olive trees for the past 18 months and it could really do with some rust repairs and paint. I figure if I get the mechanical jobs out of the way and then take a look at the bodywork a panel at a time it will eventually get done.
Post is under moderationStream item published successfully. Item will now be visible on your stream.

