Splitscreen Type 2 Busses (1949 - 1967)

Splitty Resto

Last week something strange happened, the guy who i spoke with a few months back about restoring my splitty phones up out of the blue, I originally spoke to him back in February or March where we discussed him coming to look at the project. He said he would call - he never did. I had pretty much given up hope of finding anyone in Adelaide to do the job and had decided to do it myself, but the phone call has got me thinking again about simply paying someone to do the work.

I must confess that I was a little pissed off previously with the lack of interest I had received from the guy - I figured that a splitty resto is a LOT of cash and huge entrustment, and I expected a little more enthusiasm - perhaps I expect too much? Anyhows - in his defense he said that he had lost my number and that he will come around and take a look at it - I guess I will wait and see if he calls.

I don't know about most people, but for me, I like to business in a direct and transparent manner - you want the work - you come and look at the job, we discuss some terms a deal is struck, we shake hands, the deal is sealed.

I hope he comes though this time, I have heard good reports about his work, and would prefer to entrust the job to him in preference to anyone else locally

  1632 Hits

Unique Fabrication

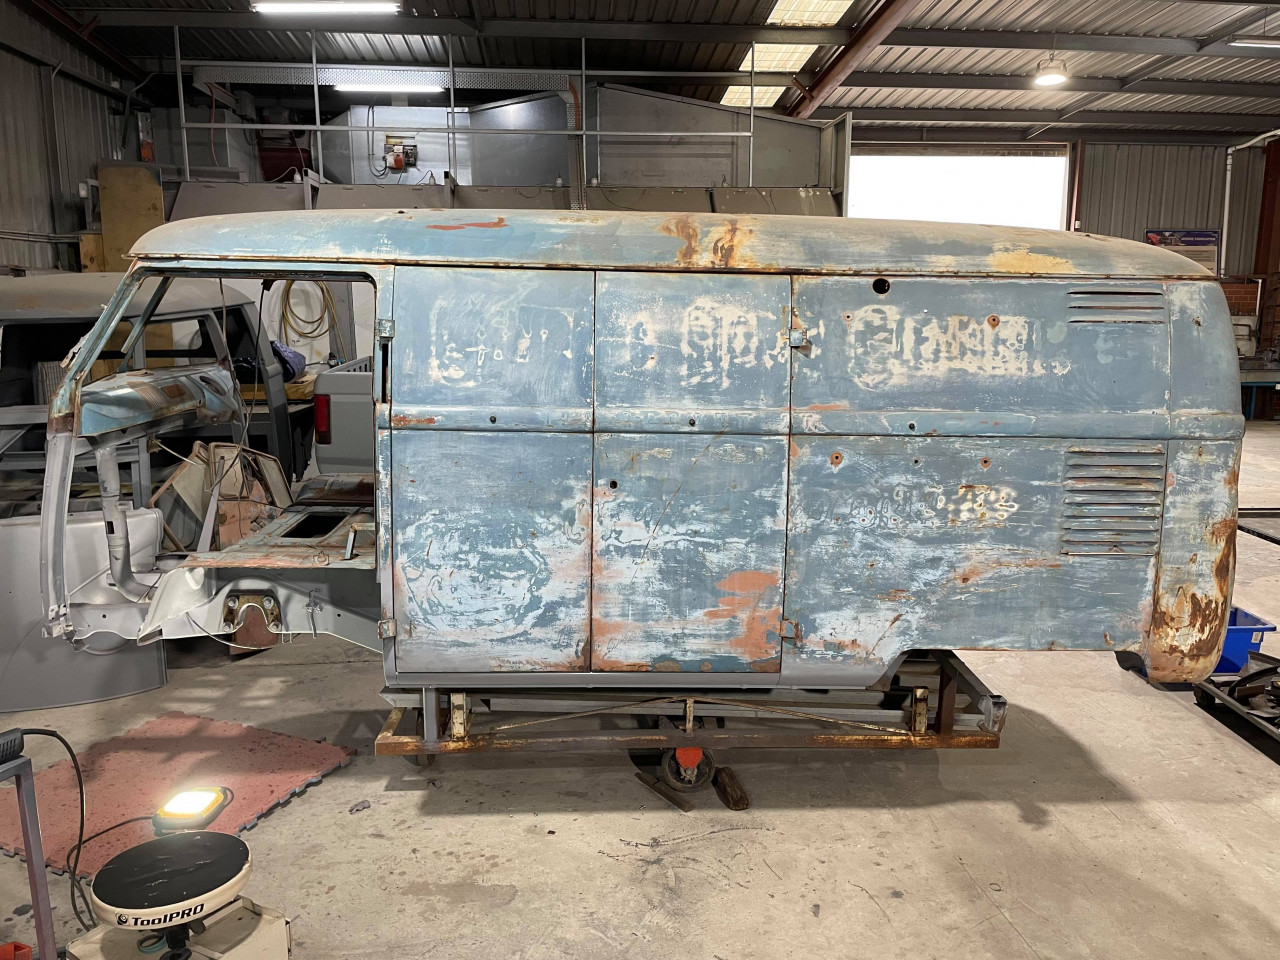
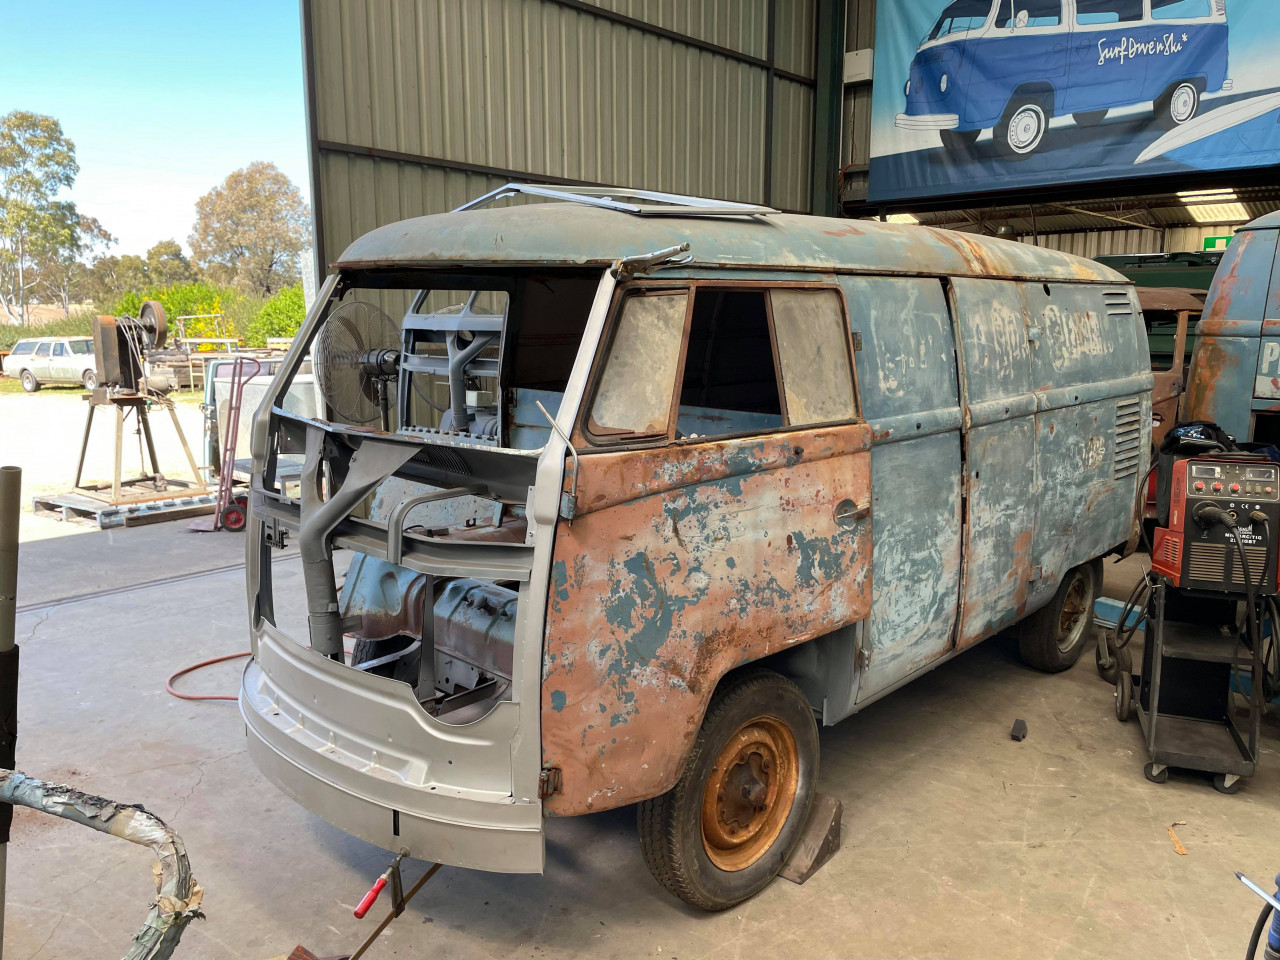
I actually managed to do some stuff directly related to the splitty today. I took a trip down to visit Unique Fabrications workshop at Holden Hill to see what things were like there. After the recent phonecall from ian, the owner, about restoring the bus, I decided that i should take the time out and go and pay him a visit, both to show that I'm serious about getting the 15 restored and to have a bit of a nose at his operation.

There was an array of cars being worked on - two 356 Pre-A coupes, a Type 1 Ghia that had some nice tasteful and well executed body mods, a couple of bugs and theier current show project a volks-rod. Unfortunately the body was at the paint shop so I didn't get to see it, but the chassis was there and looked like some pretty good work.

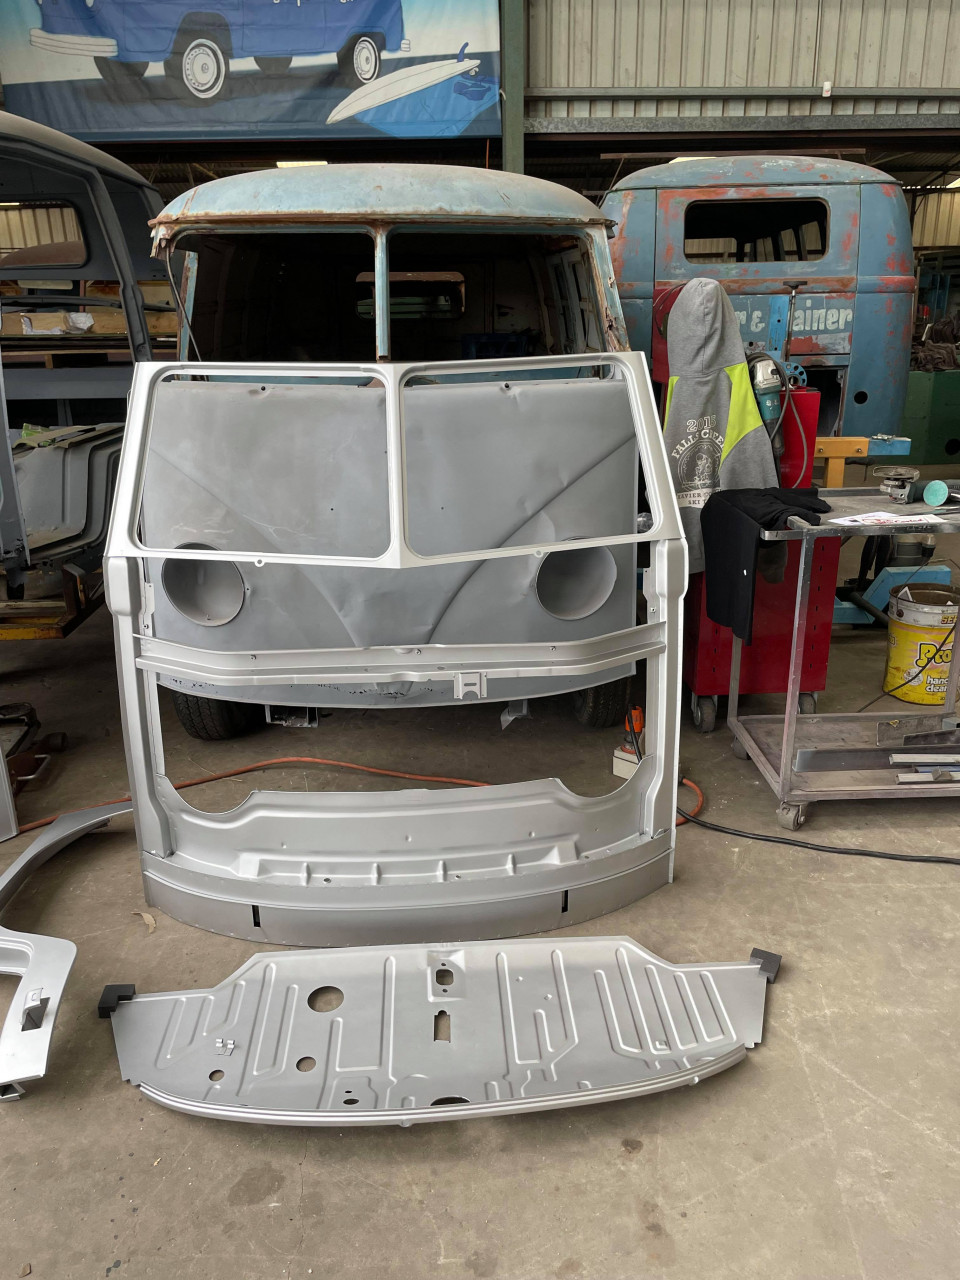
Currently Ian outsources the painting and just concentrates on the steel fabrication side of things. He is well tooled with equipment like a 3 metre guilotine, 3 metre box and pan folder, english wheel, swage rollers and the usual mig and tig setups for welding.

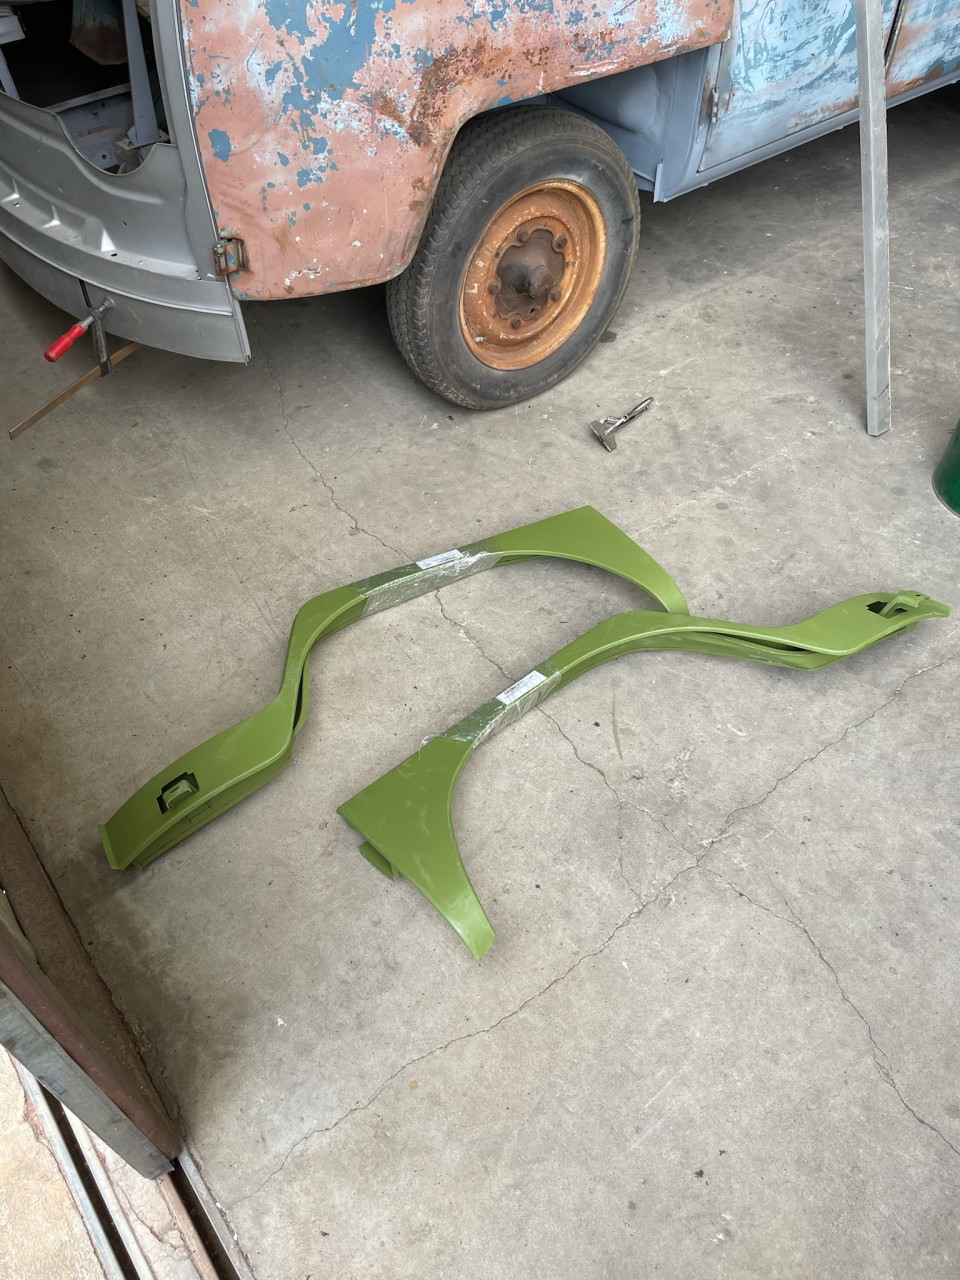
The work that I saw on the Ghia was impressive - the rear arches has been flared to take wider wheels (the car is being prepped as a rally car) the flaring was very subtle and did not look out of place.

Whilst I was there i was introduced to a few other customers, and Ian took the time to chat to me about the business and his plans. Overall a top boke, I hope things work out.

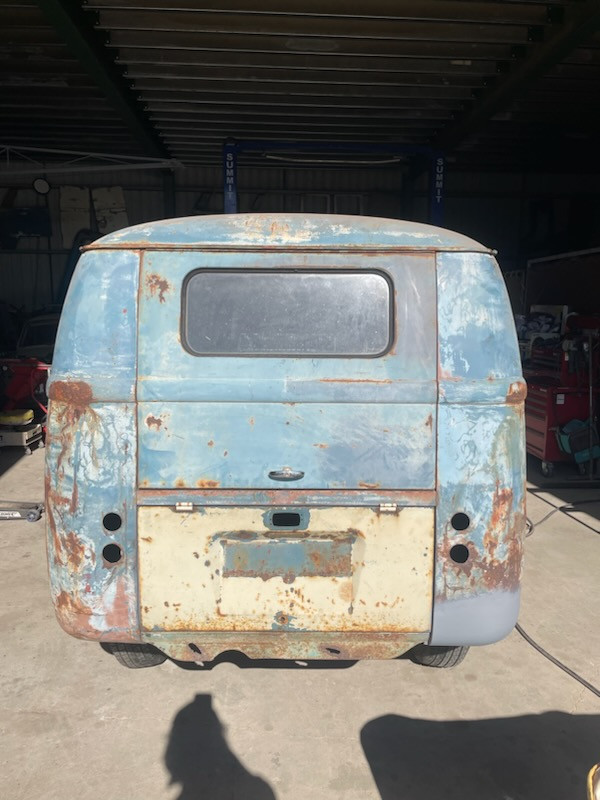
I'm now waiting for Ian to come round and take a look at the bus, he's still booked up for the foreseeable future, but hopefully this is one step closer.

Continue reading
  1975 Hits

Exhaust and Bumpers

Managed to source a pair of bumpers for the bus. Good bumpers don't seem to come up very often, every set I've ever seen sold over here seem to need a fair bit of work, and finding a pair of slash style before someone else snaps them up is more than a challenge.

The pair I bought have already been straightened so no work needed to be done apart from painting them and fitting them. Unfortunately they're not the correct slash style - they're the earlier ribbed style, but this fits with my plans for the bus and they are much better looking in my opinion. Just need to source some brackets for them now.

Also, after a bit of research i decided on an exhaust - just ordered one from vintage speed.

With the exhaust - that's pretty much everything I need as far as the engine is concerned.

Now all I need to do now is find the other 3000 odd parts that my bus has missing. 


  2117 Hits

Splitty Mcodes

imag0238


Whilst checking out VIN plate data for the new Type 34 Registry update, I ended up on a site with a rather nifty bay bus VIN decoder. http://www.alltheprettybuses.com Being completely sidetracked from my original task, I decided to see what VIn decoders there were for the 15.

As luck would have it, I snapped shot of the VIN plate from the 15 on my phone this weekend. I have no idea why, but it's a good job I did.

After a little bit of a google, I ended up over at The Samba, where they have a nice page listing the various VIN plate options. http://www.thesamba.com/vw/archives/info/id.php

The Details on my plate tell me that the bus was built on the 11th of September 1961.

It was supplied with the following options.

Continue reading
  2308 Hits

New Floor

Just noticed today that there are repop right hand drive front cab floors for sale on DSK. Have PM'd the seller - hopefully he has more for sale. The Right hand drive conversion is probably the first thing I need to sort out on the bus, so the floor is the first panel that I need to get.

Fingers crossed!

  1786 Hits

The Beginning

http://www.vdubber.com/media/images/sharingImages/14_m.jpg

Looking back it's hard to remember how I ended up looking for another splitty, I used to own one a few years back and always missed it after selling it. I think i was looking for something on ebay and stumbled across this bus by accident. After looking through about a hundred photos on photobucket I decided that it was too much money and too much work.

But the problem is... once that idea takes hold...

Anyhows, I ended up looking to South Africa for a bus. i figured they're right hand drive, in a warm climate, and a bunch cheaper.

Finding a bus there is pretty easy - just go to gumtree and browse the classifieds (don't bother visiting any South African forums - they don't like seeing busses leave the country and you will likely get flamed or worse). I found a nice looking roadworthy and restored bus for about AU$8K. After getting quotes for shipping and speaking with a past client of the seller here in Aus I was ready to go. Unfortunately, as it took me so long to get everything sorted the bus sold the day before I was ready to buy it. :( Ahh well - wasn't meant to be I guess.

So then I get to thinking about the 15 window again. My old bus was a nice looking cal look 11 window, but after spending a lot of time in it I decided that a 13 / 15 window was the way to go, and best of all it was a walkthrogh - just like my old '71 westphalia I toured around Europe in. The more I thought about it - the more I had to at least go and have a look...

So, I went and visited the owner, took a look at the bus, bartered a bit and left owning yet another project.

And that's pretty much how things have been since last December.

The bus is a left hooker, but came with a RHD beam and dash, it needs a lot of work and rust repairs to the floors, as well as patching up speaker holes and dents. I will probably get a second set of cargo doors put in to turn it into a double door - mostly as it will get used as a family wagon. It's been dropped on lowered spindles and a straight axle kit - and this is probably how I will leave it.

I will keep you all posted on the progress.

  2156 Hits

New Engine

210

Made a bit more progress towards getting the Vdubs back on the road this week, in fact it's been quite an eventfull few days. The garage has been manufactured and so I paid off the remainder of the cash owing - hopefully it will be delivered at the end of next week. In readiness for it's arrival I relocated the existing garden shed to the opposite end of the garden, all I need to do now is transplant a couple of roses and the area is clear

  2023 Hits

That'll buff out ;)

I spoke with a fellow bus enthusiast just prior to Xmas as he had some Belly pans for sale over on DSK, I need a set of these for when I get around to doing the splitty as I am planning to convert it to a double door. The reason for the belly pans is that the bus is left hand drive, and so to make it practical for use as a family wagon, it needs to have cargo doors on the kerb side, as adding in an extra set of doors seems the simplest way to go. Unfortuately the double doors weaken the structure and so the belly pans are used to add in the additional strength.

  2137 Hits

Bus, Boat, Car

bdab07e3ec4b33a593bf3ccd47993c90

Had a bit of a VW weekend this weekend.

Managed to score some nice VW stuff from a fellow VW enthusiast (cheers razor ;) ).

Picked up an original venetian for the Razor. It's an Aussie only part and appears to be a pretty rare thing. I have seen venetians for razors before, but most of them do not wrap around the rear screen correctly. This one is correctly shaped to fit the screen. I've only seen one like this (this one), but the PO said that there are maybe three others in existence.

  2264 Hits

My next project..


Hi everyone, picked up this splitty monday, 3km from home. Unsure what year it is yet, haven’t been able to find VIN number as yet. Anyone got an idea what year it is? Solid around the roof and gutters. No running gear but good in the floor. This will be my project once the beetle is going.

Here is a picture as found…

[IMG]http://i1190.photobucket.com/albums/z446/erin_russell1/russells%20kombi%201976/P2190127.jpg[/IMG]

Here is a couple of pictures when I got it home…

Continue reading
  3084 Hits

Nicks 57 bottomless money pit

Nicks 57 bottomless money pit

Hi all,as some of you know, I've been flat out doing a 57 panel patina monster for the last 18 months so I figure its time to share the highs and lows.So here goes..

The bus is a 1957 Dove Blue panel that was advertised on DSK in July 2011.It looked good,the usual rust,but for me it ticked the major box,ORIGINAL PAINT!! Turns out that the guy who was selling it had bought it from the first owner,he'd done nothing with it except drag it home so I like to think I'm the second owner or at least the second driver.

  3994 Hits

Nicks 57 bottomless money pit Part 2

b2ap3_thumbnail_IMAG0003.jpg

Well its been a while since I added to this so here goes-

After getting the panel back from the blasters we continued  the work,now on the rotisserie..All pre 59 or so buses use an open long shift rod that is only supported at the front by a metal spring open to the elements so I decided to change the set up to the later style enclosed shift tube so the rod is supported by 2 plastic bushes.This was a hell of a lot of work as the hole in each I beam and the front and rear tophats had to be enlarged and the rigid tube bashed in.Before the shift rod was installed for the last time I filled the rod itself with grease,this acts as a vibration dampener and gives the gear shift a more solid feel.


Continue reading
  3737 Hits

Split bus engine hatch repair

b2ap3_thumbnail_1-3.jpg

During the school holidays I wanted to get something achieved on the bus, so I decided to tackle the broken engine lid hinge mounts. Took a little longer than I had expected but it came up not too bad. 

A few pics showing the damage and areas in need of repair...

Continue reading
  3206 Hits

1963 Bus dash repair

1963 Bus dash repair

A little while ago I repaired the damaged part of the dash for the wiper switch on my '63 Bus.

Overall very happy with the end result, still needs a bit of work but its no problems.

I will let the pics do the talking!

  3793 Hits

Rear End Done

Ass

The rear end is done and the bodywork is nearing completion so I'm slowly turning my thoughts to what comes next...


  317 Hits
Tags:

Mail Call

dogslegs

Funky green dog legs

Pretty much the last panel required.

(although we're replacing the drivers door with a better one)

  868 Hits

Quick update

Quick update

Received an update from the shop. Front inner panel and passenger door are fitted up. Starting to look like a bus again.

  1154 Hits
Tags:
bus

Nose Job

Nose Job

Just a quick update. The shop has just taken delivery of the front panels for the bus. We decided to go for an all-in-one front sub-panel instead of separate panels as not only is it assembled on a jig and so should hopefully be nice and square, but it will also save a heap of time compared to assembling the individual panels on the bus.

  979 Hits

Resto Progress June '21

198672816_279816710561180_8993195879924602552_n
Received an update on the bus's progress. It's really coming along now. The gaps on the cargo doors are spot on which when you consider how trashed the roof and that side of the bus was is a real feat. Cooper has really outdone himself.
  961 Hits

DIY Cyclops light

DIY Cyclops light

Been getting a bit distracted by cyclops lights recently. Not that the bus is anywhere near ready for trinkets, still plenty of metalwork to do before its time to add jewellery. So completely sidetracked I decided to scratch that particular itch and have a go at making a cyclops light myself. My reasoning was that it would be good metal shaping practice, plus I had kinda figured out how to make it in my head and wanted to see if I could actually do it.

  8337 Hits

A nip and tuck and a bit of a nose job

A nip and tuck and a bit of a nose job

With the long Easter weekend I managed to get a few extra hours in on the bus. Having already cut off the front panel and one dogleg, and made up an A-Pillar repair I decided to carry on with the front end and take a look at the dented front panel.

The front nose, like pretty much every other panel on the bus has suffered a bit of abuse and has taken a bit of a pounding. Not only is there current crash damage, but there are also some previous repairs that have rusted out and need to be repaired.

  3519 Hits

DIY A pillar repairs

DIY A pillar repairs

Spent some time today making up the repair panels for the bottom of the passenger side A pillar. Fortunately there was enough of the original left for me to take some measurements from. The repair panels are in three sections - two sections form the a pillar itself and another makes the bracket that attaches to the inner lower nose panel.

  3717 Hits

Tinker

Tinker

Managed to get out and do a bit more work on the bus today, decided to carry on sorting out the lower nose inner panel. The panel that I acquired unfortunately turned out to be for a left hand drive bus, which meant that to get it to fit I needed to swap over the mounting brackets. The reason for this is that the two chassis rails that it attaches to are not identical and so have slightly different profiles, this means that the mounting brackets are also slightly different.


  4247 Hits

DIY Cab Floors

DIY Cab Floors

With the cab floor on the '55 looking like it needs replacing I decided to see if I could avoid having to buy a full repair panel by using the floor from a front cut that I have stored for my 15 window project. I have the front cut to provide a dashboard and chassis member to convert the 15 to right hand drive but for some reason the cab floor is nearly perfect. Not what you would really expect on a bus that ended up getting chopped up. Unfortunately whoever chopped the floor section out did not really do a very good job, not only did they gas axe an inch off of the floor on every side, but they also managed to cut straight through the chassis member that I need for the RHD conversion. Phah.

So I decided to dig the floor section out from the back of the 15 and take a look.

  2551 Hits

And so it begins...

And so it begins...

Those of you who know me will also know that I sell supercharger kits under the moniker 'Joe Blow'. A while back I decided that to promote the kits I would put together a logo'd rat panel van - with nice Joe Blow powered motor. Orignally I was after a lowlight panel but somehow ended up with a '55 panel instead. So today I decided to start work on eliminating the tin worm. I recently cleared a load of projects from my schedule and so figuring the bus wasn't going to fix itself I decided to get stuck in.

  3162 Hits