A stroke of luck
Been working pretty hard on getting the bus engine fixed up this weekend. After stripping the old fasty engine down and cleaning the barrels and heads ready for reconditioning, I decided that I would tear down the 1300 in readiness for it's new parts. I also wanted to get all of the tin off of the engine so that I could paint it.
Tearing down the 1300 I noticed a few diffrences from the 1600. The case has the smaller 8mm studs instead of the usual 10mm jobbies, these are fitted with 'case savers'. That's good news and always a worthy mod when rebuilding an engine. Everything came apart with no dramas, and I was quite surprised to see that at some point someone had already increased the barrel size. My bad job of trying to measure the outside of the barrel to try and determine what size cylinders were fitted was obviously way off of the mark. The heads too also have the same size valves fitted as the 1600 and are in much better condition so I decided to use these instead. Great news.
Unfortunately the barrels were more worn than the ones from the fasty engine so I will still use the ones that I've already prepped. The barrels still had witness marks from being honed at some time in the past and when removed there was traces of sealant on the bottom shoulder so it looks like at some point in the past the engine has been apart and had some work done. Without completely stripping the engine down it is hard to guess at the extent of any previous repairs, which could be anything from a line bore and crank regrind to simply rehoning the barrels and fitting new rings as is evident.
With everything apart I stripped down the heads. The combustion chambers were a little corroded so I cleaned them up with a wire brush on my battery drill. This revealed that the chambers have been shot peened and new valve seats have been fitted at some point. Good news.

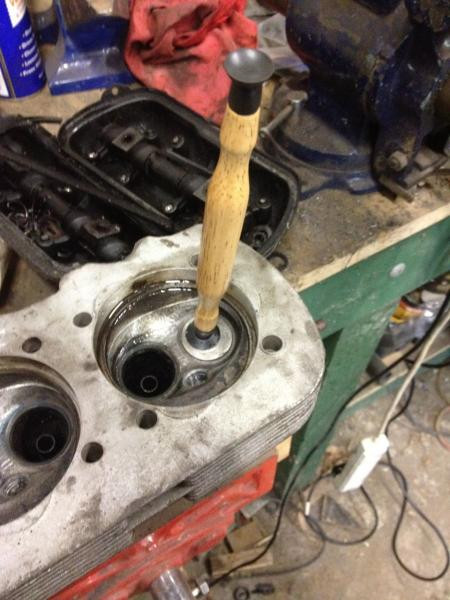
With the valves out I started to lap them in a little with some course paste. Lapping involves putting abrasive paste on the sealing surfaces and the rotating the valve back and forth to grind the valve seat and valve sealing surfaces to give a good seal. The idea is to first use a course paste and then a fine paste. Once you are happy and everything is cleaed up you can then use some engineers blue (prussian blue) to coat the valve seat. Then once dry you rotate the valve again to check that the surfaces are perfecty sealed. Rotating the valve removes the blue from the seat and transfers it to the valve, if you have a perfectly even line, you are good to go, if you have any gaps, repeat the process until they are gone.

I stopped after the coarse paste as I wanted to check the valve to see if I could improve the flow a little. The lapping leaves a grey line around the valve, this is the sealing area. What generally tends to happen is that when the valves are ground the seating area is ground a lot larger than is neccessary, this is evident by the grey line being in the centre of the sealing area. What this means is that the shoulders on the valve, above and below the sealing area are actually not needed and only serve to restrict the flow.

On a performance valve grind, the sealing area is somtimes reduced to the bare minimum, often just a few millimetres, this leaves plenty of room for the valve shape to be blended into something that flows a lot better. Of course, this is just a stock Kombi engine, so there's no need to do anything that wild here, just a few measures to help everything work a little better. I ground the valve shoulders back on my hone until they met the sealing area, obviously a valve grinder would be better, but for this quick and dirty mod the hone will do. I ended up grinding back about 1mm of excess material, which when you consider that the circumference of a 32mm valve is just nearly 100mm, that's an additional area of 100 square mm, for free.

Next I finished lapping in all of the valves and also lapped the cylinders into the heads. This helps ensure a better seal between the cylinder and head.

With the dirty work finished, I cleaned everything up in the parts washer.
With everything nice and clean I started the reassembly. I coated the valve stems with a little assembly lube and refitted them into the head with the cleaned valve springs. I also fitted the new piston rings and refitted the pistons into the barrels ready be fitted on the engine.
I managed to clean up a few other items such as the gearbox and some engine tin. Next I need to strip the rest of the tin and repaint it in enamel black. Once painted, apart from fitting a new flywheel oil seal (always a good idea if you've got the engine out) the engine will then be ready to reassemble. Hopefully this should be next weekend. that is assuming that the parts I'm waiting on arraive next week.
Fingers crossed.


Comments 2
Buylkhead tin has arrived, just waiting on new clutch and distributor.
Buylkhead tin has arrived, just waiting on new clutch and distributor.
Wrong Bulkhead tin
Wrong Bulkhead tin :(