Pinned Items
Recent Activities
-
Post is under moderationStream item published successfully. Item will now be visible on your stream.
-
Post is under moderationStream item published successfully. Item will now be visible on your stream.
-
Post is under moderationStream item published successfully. Item will now be visible on your stream.
-
Post is under moderationStream item published successfully. Item will now be visible on your stream.
-
Post is under moderationStream item published successfully. Item will now be visible on your stream.
-
Post is under moderationStream item published successfully. Item will now be visible on your stream.
-
Post is under moderationStream item published successfully. Item will now be visible on your stream.
-
Stream item published successfully. Item will now be visible on your stream.
-
Cool video showing the creation of rear quarter and roof panels using traditional methodsPost is under moderationStream item published successfully. Item will now be visible on your stream.
-
Stream item published successfully. Item will now be visible on your stream.
-
Stream item published successfully. Item will now be visible on your stream.
-
Stream item published successfully. Item will now be visible on your stream.
-
Stream item published successfully. Item will now be visible on your stream.
-
Post is under moderationStream item published successfully. Item will now be visible on your stream.
-
Post is under moderationStream item published successfully. Item will now be visible on your stream.
-
Post is under moderationStream item published successfully. Item will now be visible on your stream.
-
Post is under moderationStream item published successfully. Item will now be visible on your stream.
-
Post is under moderationStream item published successfully. Item will now be visible on your stream.
-
Post is under moderationStream item published successfully. Item will now be visible on your stream.
-
Post is under moderationStream item published successfully. Item will now be visible on your stream.
-
A word from our sponsors...
-
Post is under moderationStream item published successfully. Item will now be visible on your stream.
-
Stream item published successfully. Item will now be visible on your stream.
-
Post is under moderationStream item published successfully. Item will now be visible on your stream.
-
Post is under moderationStream item published successfully. Item will now be visible on your stream.
-
Post is under moderationStream item published successfully. Item will now be visible on your stream.
-
Post is under moderationStream item published successfully. Item will now be visible on your stream.
-
Post is under moderationStream item published successfully. Item will now be visible on your stream.
-
Post is under moderationStream item published successfully. Item will now be visible on your stream.
-
Post is under moderationStream item published successfully. Item will now be visible on your stream.
-
Post is under moderationStream item published successfully. Item will now be visible on your stream.
-
Post is under moderationStream item published successfully. Item will now be visible on your stream.
-
Post is under moderationStream item published successfully. Item will now be visible on your stream.
-
Stream item published successfully. Item will now be visible on your stream.
-
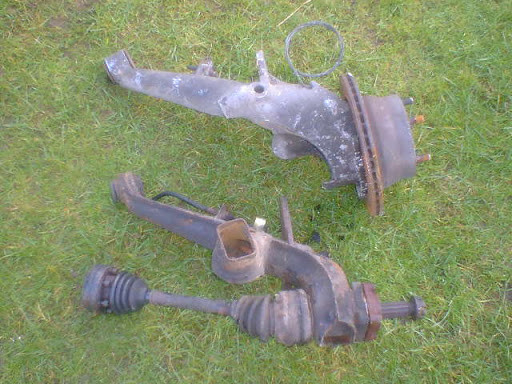
Been contemplating what to do with the rear brakes on the speedster. It has an older rear disc conversion but looks incomplete. I have some 944 trailing arms in the parts bin that I bought for my Ghia about 20 years ago but they add about an inch to the rear track. It looks like there's enough space between the arch and wheel to fit them, but that's on the Lemmertz wheels, which I'm planning to change out. I'm not sure what the offset is on the other wheels I'm planning to fit. Guess I need...Been contemplating what to do with the rear brakes on the speedster. It has an older rear disc conversion but looks incomplete. I have some 944 trailing arms in the parts bin that I bought for my Ghia about 20 years ago but they add about an inch to the rear track. It looks like there's enough space between the arch and wheel to fit them, but that's on the Lemmertz wheels, which I'm planning to change out. I'm not sure what the offset is on the other wheels I'm planning to fit. Guess I need to check.More
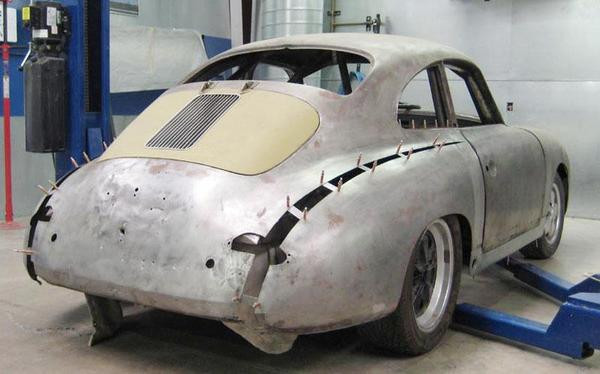
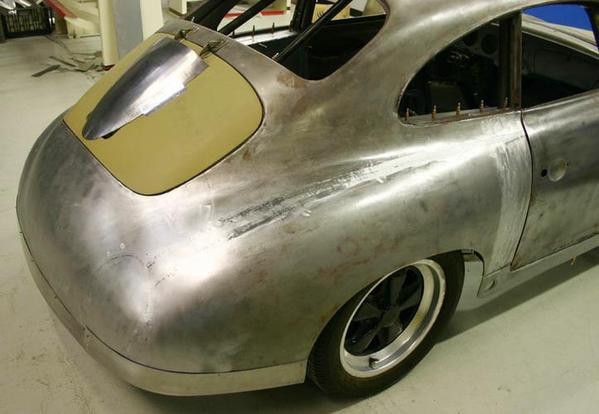
Sectioning the rear panels is one solution to gain an extra inch or two. Not sure if I'm brave enough for that. Also not sure how good it would look on a speedster. Looks pretty good on the coupe, but then the lines are a lot different.
MIght just have to try and fix up the brakes that are on there and experiment with this after it's up and running. After all it's not like I don;t have enough to do with the rest of the car Post is under moderationStream item published successfully. Item will now be visible on your stream.
 -
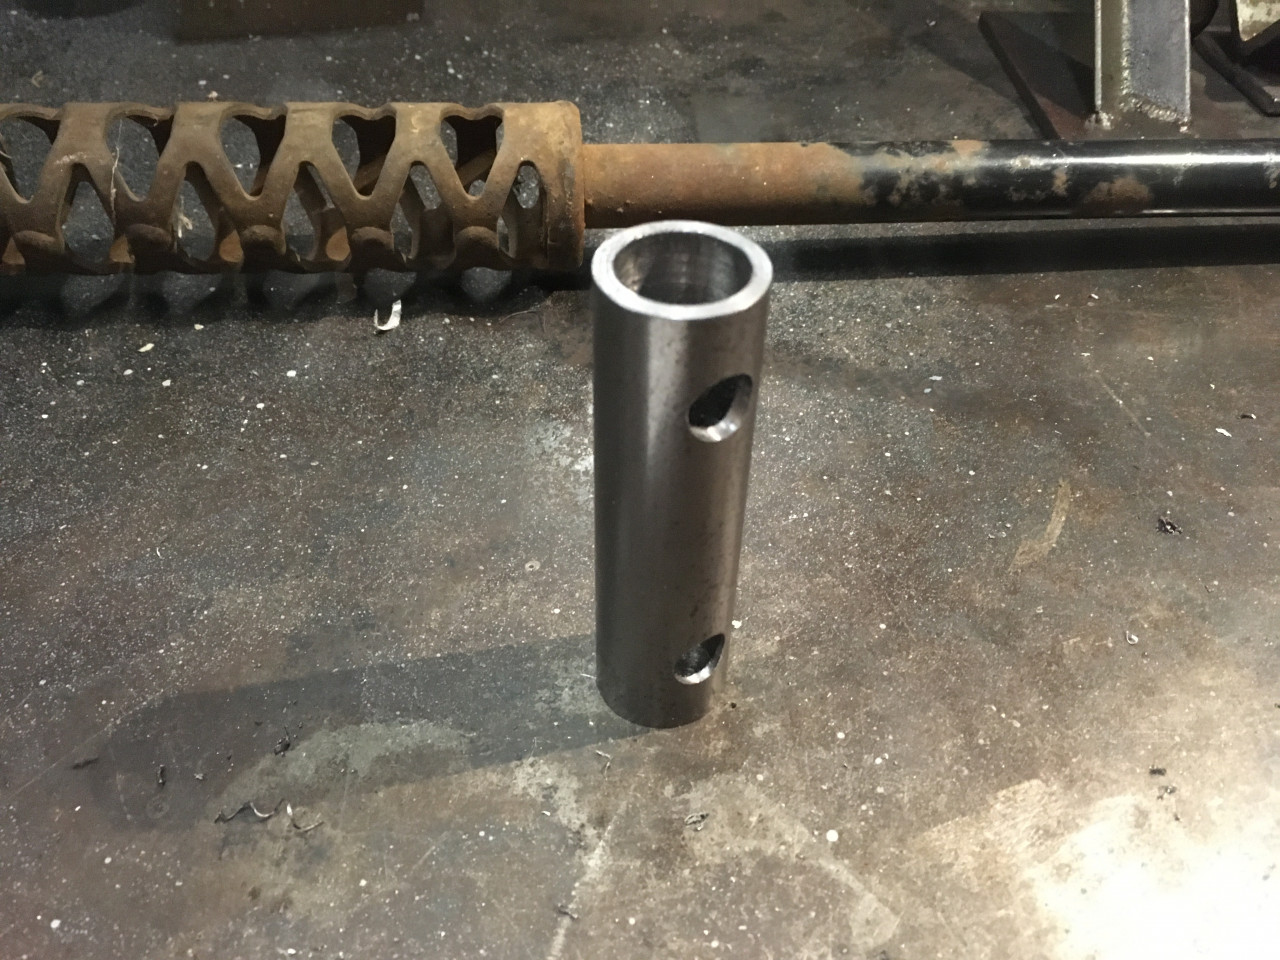
Made a start on modifying my steering column. Need to take some photos.
Post is under moderationStream item published successfully. Item will now be visible on your stream. -
Post is under moderationStream item published successfully. Item will now be visible on your stream.
-
Post is under moderationStream item published successfully. Item will now be visible on your stream.
-
Apologies from the crappy photos It's hard to take a decent picture of the horn push as no matter how you light it and what camera angle you use, it always has a bright reflections in it. (I even used reflected diffused light for the above shot).
Post is under moderationStream item published successfully. Item will now be visible on your stream. -
Post is under moderationStream item published successfully. Item will now be visible on your stream.
-
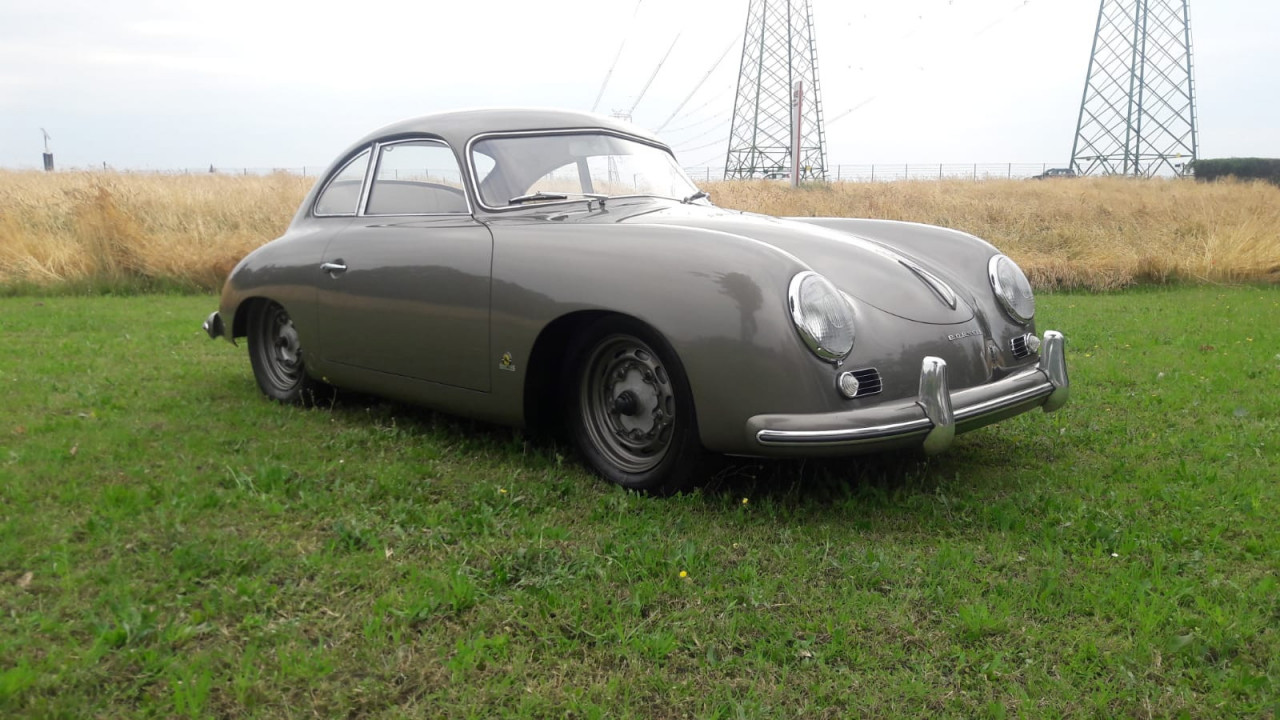
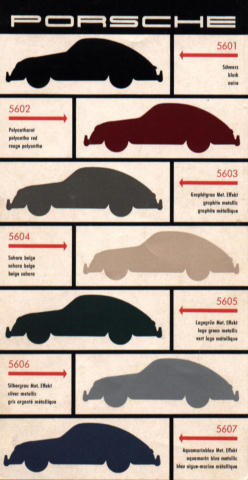
So I'm pretty much decided on 5303 Graphite metallic. It's a '54 colour, which fits with the theme I'm trying to emulate.
Post is under moderationStream item published successfully. Item will now be visible on your stream. -
A word from our sponsors...
-
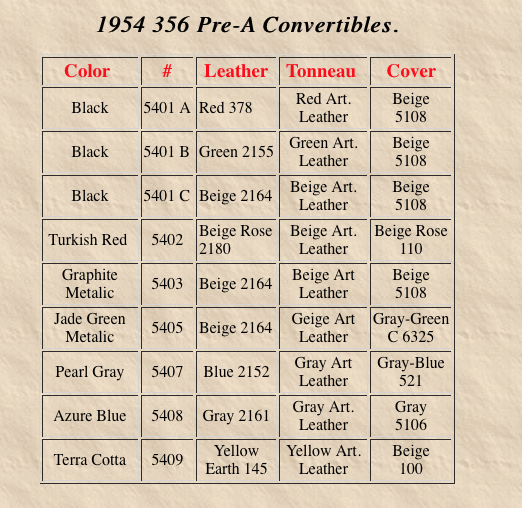
Looking at the colour combos for 54 it's looking like Black, Graphite metallic or Jade green metallic based solely on the tonneau, top and interior colours, which I already have. The Jade is not 100% correct with a beige interior / top, but it is such a lovely colour and would go well with a beige top and interior.
From what I have read the early cars all had red oxide primer.Post is under moderationStream item published successfully. Item will now be visible on your stream. -
Stream item published successfully. Item will now be visible on your stream.
-
Been looking for info on original primer colours and came across the following information relating to preparing and painting...
I'm basing this off 1953 coupes mostly, but it is true for cars going back to 1950 and up through '55 too I think. Would be happy for corrections:
Body color for a coupe:
- exterior, including headlight buckets
- interior and exterior of both front and rear lids, including latches. Not sure about the spring on the front latch.
- exterior and partially (sloppy)...Been looking for info on original primer colours and came across the following information relating to preparing and painting...More
I'm basing this off 1953 coupes mostly, but it is true for cars going back to 1950 and up through '55 too I think. Would be happy for corrections:
Body color for a coupe:
- exterior, including headlight buckets
- interior and exterior of both front and rear lids, including latches. Not sure about the spring on the front latch.
- exterior and partially (sloppy) on inside of doors. Be sure to prime the doors well, and the schutz (undercoat) on the inside of the skin. Exterior color overspray is fine on the inner door structures that hold the handle and winder.
- interior passenger area up to the A, B, C pillars (roof kept in primer). Be sure to get the area behind the dash, including the defroster tube/funnels. Be sloppy here, so you get some nice runs on the defroster funnels and leave some exposed primer on the backside of the horizontal defroster tube.
- dash gets 1 coat of exterior color front and back. Then, if the exterior color is light and the dash is dark (almost always the case), then the front side of the dash gets the dark color. Be sure to get some nice overspray on the rear of the dash, just like Reutter did it.
- sides and rear of luggage compartment get body color.
- aluminum door hinge covers get body color just on the front side. Just primer on the back.
Black semi-gloss:
- luggage area floor except for side and back walls (which get body color). Some of this will also get covered in schutz.
- battery box (also gets shutz)
- engine area (also gets covered in schutz). Reutter I think just did schutz over the primer. But all black.
- Above driver/passenger knees below the gas tank. Spray this from driver's side so you leave some primer exposed on the angles you don't hit. Just like Reutter. Footwell. Floor. (If the carpet was dark blue, the areas here gets painted dark, dark blue) The footwell and floor get this black (or dark blue) color covered in 1 layer of schutz, some of it brushed on around the tunnel and pedals (so as not to get schutz inside the tunnel or on the pedals arms.
- inside of the front nose, above battery box. The latch and jack holder area. Bottom of latch gets black, top body color. Do body color first, then black over the top. Feel free to leave some primer exposed. Did your car have grey primer or red oxide primer? Mine has lots of red oxide primer exposed. Some exterior colors used a beige primer. It seems to have varied by manufacturer and time? Typical were a red oxide primer or a beige primer.
- rear parts of lid hinges, the parts that recess into the body.
Schutz (undercoat):
- originally this stuff was terrosol or terroson
- A couple thick layers on the complete underside of the car, including fender wells, inside front of nose and rear clips. Remember, this stuff is "stone guard" and a good part of the sound insulation. Modern stuff like Würth will probably require several coats to get the ~2mm thickness original to our cars.
- Single layer (~1mm thickness) on the inside floor of the car, including the rear quarter panel side walls, rear seat cushion area (bottom buckets and back).
- General rule on the interior: if you're going to glue carpet there, it doesn't get schutz. Gluing carpet to oil-based tar stuff doesn't work well, and Reutter didn't do it as far as I can tell. This goes for the luggage area sidewalls and rear wall too, which got vinyl padding (in 1955) and tar-board sound deadening on the walls around the fuel tank. Not schutz on the front kick panels where the carpet pockets are, though do put shutz on the side footwell areas where carpet doesn't cover and are covered by the wood pedal board.
- whole engine compartment gets schutz for '53 and earlier cars (just like Speedsters). Don't know how the '54 and '55 coupes and cabs were, as these also had vinyl padding as sound deadener. Schutz in the engine area also on the inside of the exterior bodywork panels all the way up to the rear latch. Bottom of rain gutter does not get it, so mask that off, or be a little sloppy there; Reutter was.
- battery box floor and walls (though not inside of front nose (curved area). Get the little stands that hold the tire at and angle too. No schutz on the luggage compartment walls were the vinyl padding goes (or carpet padding on earlier pre-As). Top side of the little platform where the jack clamps are attached gets shutz. Feel free to sloppily get parts of the jack clamps too. Get schutz all the way back behind the battery onto the torsion tubes and little narrow floor area in the center below torsion tubes.
- luggage area floor from the tire up to the gas tank. Under the gas tank does not get schutz, just black paint and felt strip pads between floor and gas tank. Areas to the side of the gas tank get schutz. Mask off the chassis number raised area from getting shutz. Just black paint there.
A thicker version of Terrosol was used as a sealant on all the seams before the car was painted and given schutz. Brushed on with a wide brush So bottom of the car seams gets it, and the inside areas in the seams behind the dash, etc. Any seam that might let in water gets it, especially areas behind dash below windshield, around the hinge pockets, etc. Then the paint is done over the seam sealer on the inside, and schutz over it on the bottom side.Post is under moderationStream item published successfully. Item will now be visible on your stream. -
Post is under moderationStream item published successfully. Item will now be visible on your stream.
-
Stream item published successfully. Item will now be visible on your stream.
-
Stream item published successfully. Item will now be visible on your stream.
-
Post is under moderationStream item published successfully. Item will now be visible on your stream.
-
Another really good article on creating believable patina, this time on a fiberglass '34 Coupe.Post is under moderationStream item published successfully. Item will now be visible on your stream.
-
Been reading some primers on creating believable patina. This one's pretty good...Post is under moderationStream item published successfully. Item will now be visible on your stream.
There are no activities here yet


